| Get the entire How to Build Your Own PC in affordable hard copy |
Click Here!
|
|
|
Installing the Floppy Ribbon Cable
If you look again at the floppy cable,
you’ll notice one side of the cable looks like it’s torn (see
Figure 2).
It’s not. It’s just designed with a twist. This end of the
cable will connect to the 3.5" drive. Connect the end with the twist
to your floppy drive by using your thumbs and fingers to push the floppy
cable fully into place (Figure 92).
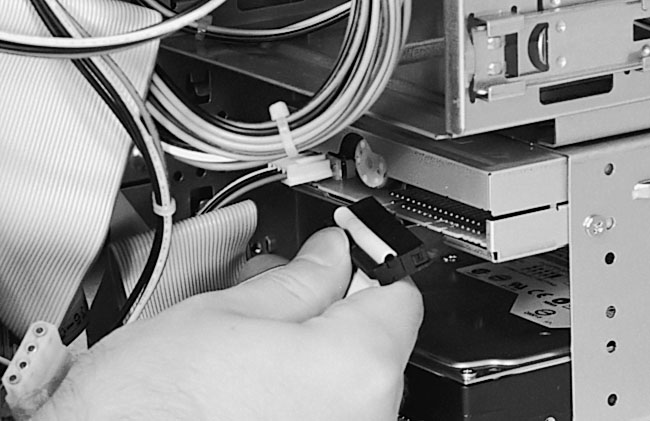
Figure 92: Connecting a ribbon cable into the floppy drive The end with the twist goes to the drive. The other end will go to the mainboard. This figure also shows the power cable connected to the floppy drive. The order in which you connect the ribbon cables and power cables doesn’t matter. If it’s easier for you, you can put the case on its side to make the connections. Here the case sits upright.
|
The other end will connect
to the mainboard (Figure 93).
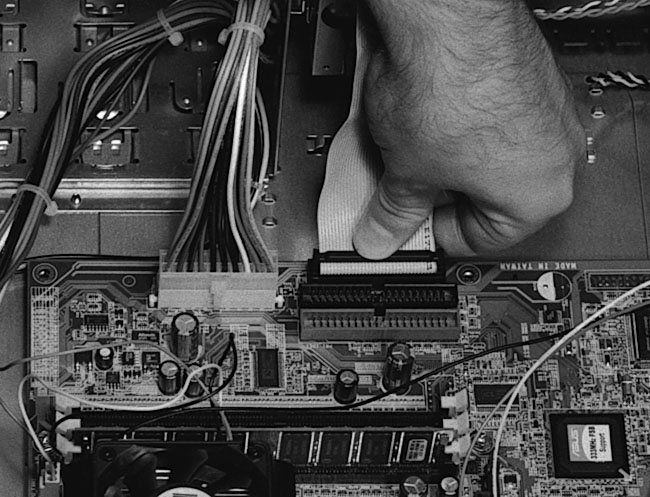
Figure 93: Connecting the floppy ribbon cable to the mainboard Push the connector straight down. Here the case sits on its side.
|
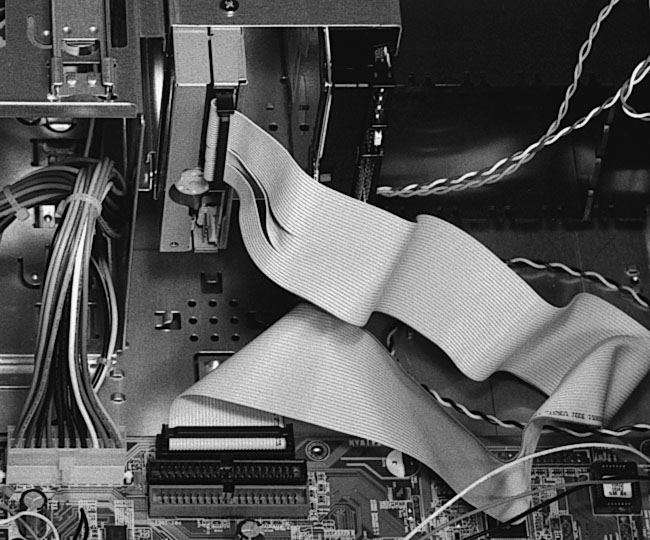
Figure 94
shows the floppy ribbon cable fully connected.
Figure 94: Floppy ribbon cable fully installed
|
| If you find The PC Guide useful, please consider making a small Paypal donation to help the site, using one of the buttons below. You can also donate a custom amount using the far right button (not less than $1 please, or PayPal gets most/all of your money!) In lieu of a larger donation, you may wish to consider buying the inexpensive print version of How to Build Your Own PC, direct from the author. Thanks for your support! |
|
|
Home -
Table Of Contents - Contact Us
How to Build Your Own PC (http://www.PCGuide.com/byop/) on PCGuide.com
Version 1.0 - Version Date: May 4, 2005
Adapted with permission from a work created by Charlie Palmer.
PCGuide.com Version © Copyright 2005 Charles M. Kozierok. All Rights Reserved.
Not responsible for any loss resulting from the use of this site.
|


