| Want this info 'offline' for your PC build? Get the book! |
Click Here!
|
|
|
Installing the Hard Drive IDE Cable
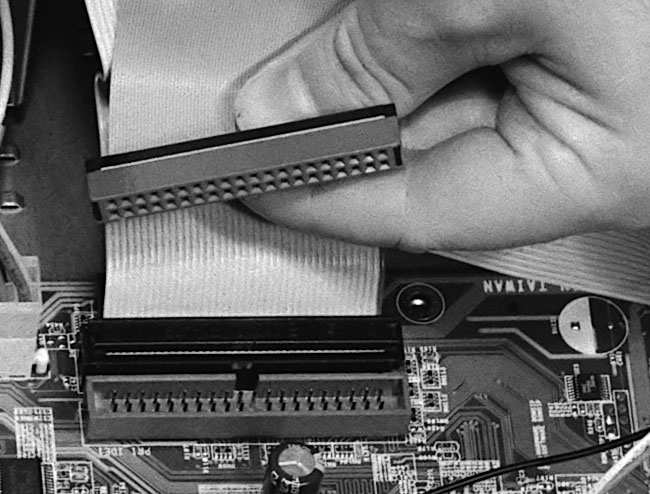
Plug in the hard drive ribbon cable
to the drive (Figure 98).
Then connect it to the mainboard (Figure 99);
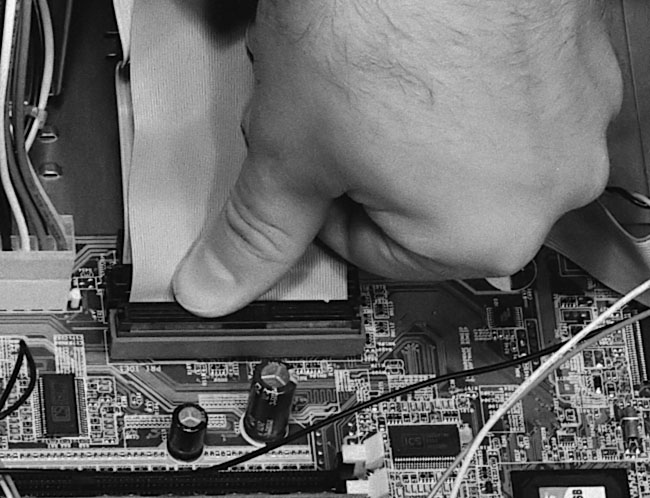
when properly installed it will appear as in Figure 100.
Be sure to seat it fully by pushing it in with your fingers or thumbs.
Use the connectors at the ends and ignore the connector in the middle
of the cable, unless you wish to install another device such as a secondary
device on the cable. If you wish to install a second drive on the cable,
it’s usually easiest to connect the middle connector first, before
connecting the end connector to the primary drive.
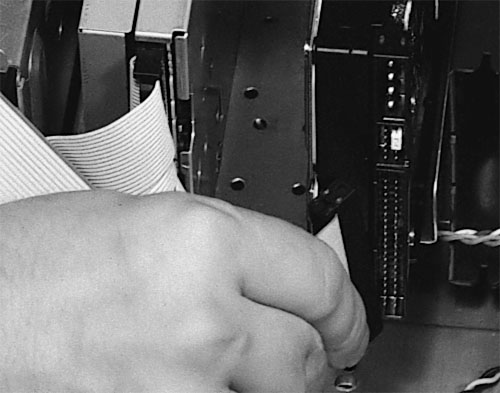
Figure 98: Connecting ribbon cable to the hard drive The black end of the 40-pin ribbon cable should be connected to the hard drive. Use the ribbon cable which came with the hard drive. The other end of the ribbon cable should connect to the mainboard’s primary IDE controller. In addition, you should set the hard drive to the primary device on the primary controller. (Figure 20 shows the back of a hard drive.)
|
Figure 99: Connecting the hard drive ribbon to the mainboard
|
Figure 100: Pushing the hard drive ribbon cable into the mainboard
|
| If you find The PC Guide useful, please consider making a small Paypal donation to help the site, using one of the buttons below. You can also donate a custom amount using the far right button (not less than $1 please, or PayPal gets most/all of your money!) In lieu of a larger donation, you may wish to consider buying the inexpensive print version of How to Build Your Own PC, direct from the author. Thanks for your support! |
|
|
Home -
Table Of Contents - Contact Us
How to Build Your Own PC (http://www.PCGuide.com/byop/) on PCGuide.com
Version 1.0 - Version Date: May 4, 2005
Adapted with permission from a work created by Charlie Palmer.
PCGuide.com Version © Copyright 2005 Charles M. Kozierok. All Rights Reserved.
Not responsible for any loss resulting from the use of this site.
|


