| Read up on building your PC, anywhere you go! |
Click Here!
|
|
|
Finding a PCI Card Slot and Removing the Slot Cover
Once you’ve installed one PCI
card, you’ve essentially installed them all. They’re all installed
in the same manner. Because the mainboard in the demonstrated build
has onboard sound and onboard networking, we’ll install a PCI internal
modem card, which gives the computer dial-up access to the Internet.
Remove the PCI card from its static
proof bag. As with all other devices sensitive to static electricity,
touch something metal before touching the card, such as the back of
the case or a metal railing. (No, a can of beer doesn’t count!)
If you want, you can also wear a grounding wrist strap, but it isn’t
necessary. Try to handle the card by the edges and in particular by
the metal strip at the end.
Position the card above a PCI slot
you plan to use. You’ll probably find that some slots won’t
be accessible after some cards are installed. For example, your AGP
video card might have its own heatsink which protrudes too far out to
allow the PCI slot next to it to be accessible.
It’s good to plan ahead and
decide how many cards you need. While you’ll usually have room
to add another card later, I usually try to skip a slot between cards,
if possible, so they get better air circulation. If this isn’t
possible, you might want to see that the cards that will generate a
lot of heat have an extra, unused slot around them (as with the AGP
card). Thinner cards can be used in adjacent PCI slots. Other than these
considerations, feel free to use whatever slot you prefer.
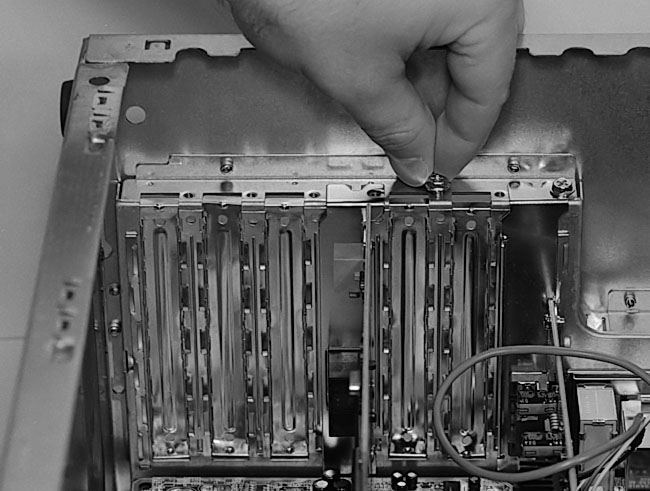
Remove the PCI slot cover just as
you did with the AGP slot cover. Take a coarse screw from the set of
screws that came with the case. Test the screw to be sure it goes in
properly (Figure 122).
For cheaper cases which have poor threads and expansion slot covers
that permanently come off, I’ve found testing the screw can often
save you from trying to use a slot where the screw hole doesn’t
seem to be properly tapped. (A tap is a little device that turns a hole
into a screw thread.)
Figure 122: Testing a screw from the set of screws that came with the PC case We are testing the screw in the hole next to the installed PCI card. All slot covers should use the same type of screw, usually a short, coarsely-threaded screw. Sometimes a screw won’t go easily because of poorly tapped threads on the case.
|
| If you find The PC Guide useful, please consider making a small Paypal donation to help the site, using one of the buttons below. You can also donate a custom amount using the far right button (not less than $1 please, or PayPal gets most/all of your money!) In lieu of a larger donation, you may wish to consider buying the inexpensive print version of How to Build Your Own PC, direct from the author. Thanks for your support! |
|
|
Home -
Table Of Contents - Contact Us
How to Build Your Own PC (http://www.PCGuide.com/byop/) on PCGuide.com
Version 1.0 - Version Date: May 4, 2005
Adapted with permission from a work created by Charlie Palmer.
PCGuide.com Version © Copyright 2005 Charles M. Kozierok. All Rights Reserved.
Not responsible for any loss resulting from the use of this site.
|


